用户与组
在linux中用户在创建时有一个基本组(同名或者指定),创建好后,再加入的其它组称为扩展组。
每个用户都有唯一的id.
| UID | 用户类型 |
|---|---|
| 0 | 系统的管理员 |
| 1~999 | 系统用户(被用来运行系统的一些服务) |
| 1000~ | 普通用户 |
useradd命令
用来创建新的用户
user [选项] 用户名

>>>
[root@ecs-3511-0001 ~]# useradd test01 -u 888
[root@ecs-3511-0001 ~]# useradd test01 -u 8888
useradd: user 'test01' already exists
[root@ecs-3511-0001 ~]# useradd testuser0 -u 8888
[root@ecs-3511-0001 ~]# useradd testuser0 -u 8888
useradd: user 'testuser0' already exists
[root@ecs-3511-0001 ~]# useradd testuser1 -u 8888
useradd: UID 8888 is not unique
[root@ecs-3511-0001 ~]# useradd testuser1 -s /sbin/nologin
[root@ecs-3511-0001 ~]# id testuser1
uid=8889(testuser1) gid=8889(testuser1) groups=8889(testuser1)
参数 作用 -d 指定用户的家目录(默认为/home/username) -e 账户的到期时间,格式为YYYY-MM-DD. -u 指定该用户的默认UID -g 指定一个初始的用户基本组(必须已存在) -G 指定一个或多个扩展用户组 -N 不创建与用户同名的基本用户组 -s 指定该用户的默认Shell解释器 tip:
当使用了 -s /sbin/nologin 的参数时,则用户将不能登录到系统中。作用:当一些用户的存在只是为了启动服务,无需终端操作时,我们可以使用su 切换到这些用户来执行操作。降低了服务的用户权限,提高了系统的安全。
groupadd命令
用于创建用户组。
groupadd [选项] 群组名

>>>
[root@ecs-3511-0001 ~]# groupadd dbagroup
[root@ecs-3511-0001 ~]# useradd -g dbagroup mysqluser
[root@ecs-3511-0001 ~]# id mysqluser
uid=8890(mysqluser) gid=8890(dbagroup) groups=8890(dbagroup)
usermod命令
用来修改用户的一些信息
usermod [参数] 用户名

>>>
[root@ecs-3511-0001 ~]# groupadd linuxprobe
[root@ecs-3511-0001 ~]# id  mysqluser
uid=8890(mysqluser) gid=8890(dbagroup) groups=8890(dbagroup)
[root@ecs-3511-0001 ~]# usermod -G linuxprobe  mysqluser
[root@ecs-3511-0001 ~]# id  mysqluser
uid=8890(mysqluser) gid=8890(dbagroup) groups=8890(dbagroup),8891(linuxprobe)
[root@ecs-3511-0001 ~]# groupadd linuxprobe2
[root@ecs-3511-0001 ~]# usermod -G linuxprobe2  mysqluser
[root@ecs-3511-0001 ~]# id  mysqluser
uid=8890(mysqluser) gid=8890(dbagroup) groups=8890(dbagroup),8892(linuxprobe2)
[root@ecs-3511-0001 ~]# usermod -G linuxprobe2,linuxprobe  mysqluser
[root@ecs-3511-0001 ~]# id  mysqluser
uid=8890(mysqluser) gid=8890(dbagroup) groups=8890(dbagroup),8891(linuxprobe),8892(linuxprobe2)
参数 作用 -c 填写用户账户的备注信息 -d -m 参数-m与参数-d连用,可重新指定用户的家目录并自动把旧的数据转移过去 -e 账户的到期时间,格式为YYYY-MM-DD -g 变更所属用户组 -G 变更扩展用户组 -L 锁定用户禁止其登录系统 -U 解锁用户,允许其登录系统 -s 变更默认终端 -u 修改用户的UID tip:
-G 时会替换原有的用户扩展分组,如果需要指定多个组,需要用
,隔开passwd命令
用来修改用户登录相关的信息
passwd [参数] 用户名

[root@ecs-3511-0001 ~]# passwd mysqluser
Changing password for user mysqluser.
New password:
BAD PASSWORD: The password is shorter than 8 characters
Retype new password:
passwd: all authentication tokens updated successfully.
[root@ecs-3511-0001 ~]# echo 123 | passwd --stdin mysqluser
Changing password for user mysqluser.
passwd: all authentication tokens updated successfully.
userdel命令
用来删除用户
userdel [参数] 用户名

>>>
[root@ecs-3511-0001 ~]# ls /home
mysqluser  test01  testuser0  testuser1  user1  user2  user3  user4
[root@ecs-3511-0001 ~]# userdel mysqluser
[root@ecs-3511-0001 ~]# ls /home
mysqluser  test01  testuser0  testuser1  user1  user2  user3  user4
[root@ecs-3511-0001 ~]# userdel -r  test01
[root@ecs-3511-0001 ~]# ls /home
mysqluser  testuser0  testuser1  user1  user2  user3  user4
文件的权限与归属
文件的类型
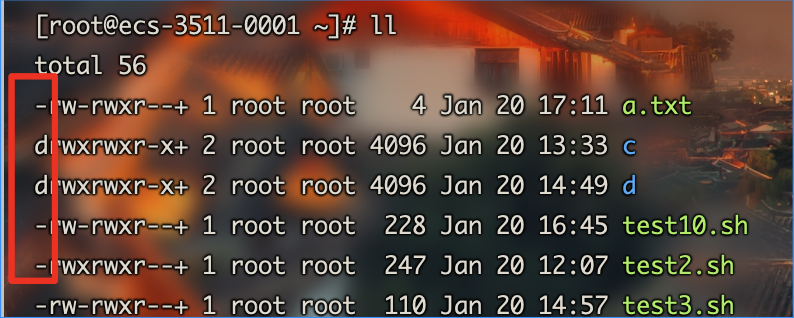
在使用ll命令时,在第一列的第一个字符代表的就是文件类型。
常见的文件类型有:
| 字符 | 文件类型 |
|---|---|
| - | 普通文件 |
| d | 目录文件 |
| l | 链接文件 |
| b | 块设备文件 |
| c | 字符设备文件 |
| p | 管道文件 |

文件的权限
# 设置文件的权限
chmod [参数] {权限} {文件|文件夹}
# 设置文件的所有者/组
chown {所有者:所有组} {文件|文件夹}

在使用ll命令时,在第一列的第一个字符后的9个字符代表的就是文件的权限。
| 字符 | 英文 | 对文件 | 对目录 |
|---|---|---|---|
| r | read | 可以查看文件 | 可以列出目录内的文件 |
| w | write | 可以修改文件内容 | 可以在目录内进行进行新建、剪切、删除、复制、重命名等权限 |
| x | excute | 可以执行文件 | 可以切换到目录 |


文件的特殊权限
SUID
SUID可以让程序的执行者在执行程序时,拥有管理员的权限.在拥有了SUID权限后,可执行文件的权限所有者权限将改变:
- rwx 变为 rws
- rw- 变为 rwS
用户的密码存储在/etc/shadow中,普通用户时无法查看修改的,但可以使用passwd命令修改,passwd就是拥由SUID权限
# 单独设置SUID权限
chmode u+s {文件|文件夹}
# 取消
chmode u-s {文件|文件夹}

# 查看时可以发现除了管理员,其他用户无法打开/etc/shadow
[linuxprobe@linuxprobe ~]$ ll /etc/shadow
----------. 1 root root 1312 Jan  4 03:48 /etc/shadow
[linuxprobe@linuxprobe ~]$ cat /etc/shadow
cat: /etc/shadow: Permission denied
[linuxprobe@linuxprobe ~]$ su - root
Password:
[root@linuxprobe ~]# cat /etc/shadow
root:$6$RAgPmaFB5NlEr2ou$xkM78uzB2pmMz3gseZqIEQgSH3R5.IjOUtCGwGkBGexPIPqJ10IojVNlsKxLpBbQKQQbyWtvHgksG.uhEDX
...
linuxprobe:$6$yQmCtfgW//tTd0Xj$eflIfDE48TF7z51HEFXapFyOMQojfVdzLCozhWDTGyWQc8dMW9y9bq7MTEpB0WcYcNDL4W3AQhEwLGcfELDT3.::0:99999:7:::
# 普通用户可以使用passwd修改/etc/shadow文件
[root@linuxprobe ~]# su - linuxprobe
[linuxprobe@linuxprobe ~]$ passwd
Changing password for user linuxprobe.
Current password:
New password:
Retype new password:
passwd: all authentication tokens updated successfully.
[linuxprobe@linuxprobe ~]$ su - root
Password:
[root@linuxprobe ~]# cat /etc/shadow
root:$6$RAgPmaFB5NlEr2ou$xkM78uzB2pmMz3gseZqIEQgSH3R5.IjOUtCGwGkBGexPIPqJ10IojVNlsKxLpBbQKQQbyWtvHgksG.uhEDX...
# 此处可以看到文件内容已经改变
linuxprobe:$6$P7NF8/eh3kRJBFoa$ekGm3gw.jGGZcMx4jrQcxuO0t2ILsMftA7TvNzxgYp1cSsdqlN7RNrrF5ze2wBCndxa33tw3j6AbKEK06rNvO/:18658:0:99999:7:::
[root@linuxprobe ~]# ll /bin/passwd
-rwsr-xr-x. 1 root root 34512 Aug 13  2018 /bin/passwd

SGID
如果设定了SGID,目录内新建的文件继承上级目录所有组的名称.同时让执行文件的用户拥有文件所属组的权限.
# 单独设置SGID权限
chmode -R g+s {文件|文件夹}
# 取消
chmode -R g-s {文件|文件夹}
SBIT
设置了SBIT权限位(又称粘滞位).设置后文件夹下的内容只有自己创建的内容才有修改的权力.默认的/tmp文件夹就拥有SBIT权力.
# 设置SBIT权限
chmode -R o+t {文件|文件夹}
# 取消
chmode -R o-t {文件|文件夹}


[root@linuxprobe tmp]# su - test01
[test01@linuxprobe ~]$ cd /tmp
[test01@linuxprobe tmp]$ touch b.txt
[test01@linuxprobe tmp]$ vim b.txt
[test01@linuxprobe tmp]$ chmod 777 /tmp/b.txt
[test01@linuxprobe tmp]$ su - linuxprobe
Password:
[linuxprobe@linuxprobe ~]$ cd /tmp
[linuxprobe@linuxprobe ~]$ rm -f /tmp/b.txt
rm: cannot remove '/tmp/b.txt': Operation not permitted
[linuxprobe@linuxprobe ~]$ ll /tmp/b.txt
-rwxrwxrwx. 1 test01 test01 9 Jan 31 18:09 /tmp/b.txt

[root@linuxprobe ~]# su - test01
[test01@linuxprobe ~]$ cd /tmp
[test01@linuxprobe tmp]$ ll -a b.txt
-rwxrwxrwx. 1 test01 test01 9 Jan 31 18:09 b.txt
文件的隐藏属性
隐藏属性针对的是所有用户,使用隐藏属性可以对文件进行更多的限制
# 添加或删除隐藏属性
chattr -属性|+属性 文件名

# 查看文件的属性
lsattr [文件名]


#正常删除文件
>>>
[root@ecs-3511-0001 ~]# echo test > test100.txt
[root@ecs-3511-0001 ~]# ll test100.txt
-rw-r--r-- 1 root root 5 Jan 21 14:44 test100.txt
[root@ecs-3511-0001 ~]# rm test100.txt
rm: remove regular file 'test100.txt'? y
[root@ecs-3511-0001 ~]# ll test100.txt
ls: cannot access 'test100.txt': No such file or directory
#添加隐藏属性,然后删除文件
>>>
[root@ecs-3511-0001 ~]# echo test > test100.txt
[root@ecs-3511-0001 ~]# ll test100.txt
-rw-r--r-- 1 root root 5 Jan 21 14:44 test100.txt
[root@ecs-3511-0001 ~]# chattr +a test100.txt
[root@ecs-3511-0001 ~]# ll test100.txt
-rw-r--r-- 1 root root 5 Jan 21 14:44 test100.txt
[root@ecs-3511-0001 ~]# rm test100.txt
rm: remove regular file 'test100.txt'? y
rm: cannot remove 'test100.txt': Operation not permitted
#查看并删除隐藏属性,然后删除文件
## 此处查看时有隐藏属性e是因为服务器中文件系统的原因
>>>
[root@ecs-3511-0001 ~]# lsattr test100.txt
-----a--------e----- test100.txt
[root@ecs-3511-0001 ~]# chattr -a test100.txt
[root@ecs-3511-0001 ~]# rm test100.txt
rm: remove regular file 'test100.txt'? y
[root@ecs-3511-0001 ~]# | 参数 | 作用 |
|---|---|
| i | 无法对文件进行修改;若对目录设置了该参数,则仅能修改其中的子文件内容而不能新建或删除文件 |
| a | 仅允许补充(追加)内容,无法覆盖/删除内容(Append Only) |
| S | 文件内容在变更后立即同步到硬盘(sync) |
| s | 彻底从硬盘中删除,不可恢复(用0填充原文件所在硬盘区域) |
| A | 不再修改这个文件或目录的最后访问时间(atime) |
| b | 不再修改文件或目录的存取时间 |
| D | 检查压缩文件中的错误 |
| d | 使用dump命令备份时忽略本文件/目录 |
| c | 默认将文件或目录进行压缩 |
| u | 当删除该文件后依然保留其在硬盘中的数据,方便日后恢复 |
| t | 让文件系统支持尾部合并(tail-merging) |
| x | 可以直接访问压缩文件中的内容 |
文件访问控制列表
通过FACL可以对用户和文件进行单独的权限控制。在设置facl后,权限后的.会变为+
# 查看FACL权限
getfacl {目录}

# 设置权限
setfacl {参数} {文件|文件夹}

>>>
# 权限测试
[root@ecs-3511-0001 ~]# ll -d /root
dr-xr-x---. 6 root root 4096 Jan 21 16:08 /root
[root@ecs-3511-0001 ~]# getfacl /root
getfacl: Removing leading '/' from absolute path names
# file: root
# owner: root
# group: root
user::r-x
group::r-x
other::---

[root@ecs-3511-0001 ~]# su - user1
Last login: Thu Jan 21 16:03:39 CST 2021 on pts/0
[user1@ecs-3511-0001 ~]$ cd /root
-bash: cd: /root: Permission denied
# 修改权限
[user1@ecs-3511-0001 ~]$ su - root
Password:
Last login: Thu Jan 21 16:25:33 CST 2021 on pts/0
[root@ecs-3511-0001 ~]# setfacl -Rm u:user1:rwx /root
[root@ecs-3511-0001 ~]# ll -d /root
dr-xrwx---+ 6 root root 4096 Jan 21 16:08 /root
[root@ecs-3511-0001 ~]# getfacl /root
getfacl: Removing leading '/' from absolute path names
# file: root
# owner: root
# group: root
user::r-x
user:user1:rwx
group::r-x
mask::rwx
other::---

[root@ecs-3511-0001 ~]# su - user1
Last login: Thu Jan 21 16:28:47 CST 2021 on pts/0
[user1@ecs-3511-0001 ~]$ cd /root
[user1@ecs-3511-0001 root]$ ls
a.txt  c  d  test10.sh  test2.sh  test3.sh  test4.sh  test5.sh  test6.sh  test7.sh  test8.sh  test9.sh  test.sh  userlist.txt

# 删除权限
[user1@ecs-3511-0001 root]$ su - root
Password:
Last login: Thu Jan 21 16:29:03 CST 2021 on pts/0
Last failed login: Thu Jan 21 16:31:51 CST 2021 on pts/0
There were 2 failed login attempts since the last successful login.
[root@ecs-3511-0001 ~]# setfacl -b /root
[root@ecs-3511-0001 ~]# ll -d /root
dr-xr-x---. 6 root root 4096 Jan 21 16:08 /root
[root@ecs-3511-0001 ~]# su - user1
Last login: Thu Jan 21 16:30:56 CST 2021 on pts/0
[user1@ecs-3511-0001 ~]$ cd /root
-bash: cd: /root: Permission denied| 参数 | 作用 |
|---|---|
| R | 会对目录进行递归设置 |
| m | 对普通文件设置 |
| b | 删除权限 |
su命令与sudo服务
su命令
可以在不同的用户之间方便的切换,管理员切换到其他用户时,不需要密码,从用户切换到管理员时需要密码。
su [-] 用户名tip:当使用了
-时,会将环境变量也进行切换,建议加-
sudo服务
可以给指定的用户提供特定的命令执行权限。用户在使用命令时前边加sudo即可提升权限。
# 使用visudo进行sudo服务的添加,格式如下(命令需要写全路径):
{用户名} {允许用户的网段}={以哪个用户来执行命令}  {参数} {命令}
# 常用的设置方式
{用户名} ALL=(ALL) NOPASSWD:{命令}


>>>
# 1. 使用visudo设置权限
user1 ALL=(ALL) NOPASSWD:/usr/bin/ls

# 2. 使用sudo提高权限
[user1@ecs-3511-0001 ~]$ ls  /root
ls: cannot open directory '/root': Permission denied
[user1@ecs-3511-0001 ~]$ sudo  ls /root
a.txt  c  d  test10.sh  test2.sh  test3.sh